Helpful Tips:
- Use a personal device - work devices could cause delays due to security preferences
- Use a personal email address instead of a CSUN assigned email address (if you have one)
- Disable Pop-up blockers
- Clear Cache
- Access the application through the specific programs “Online Application” link. Do not use a bookmarked link or a saved link
Tips For Completing The Application
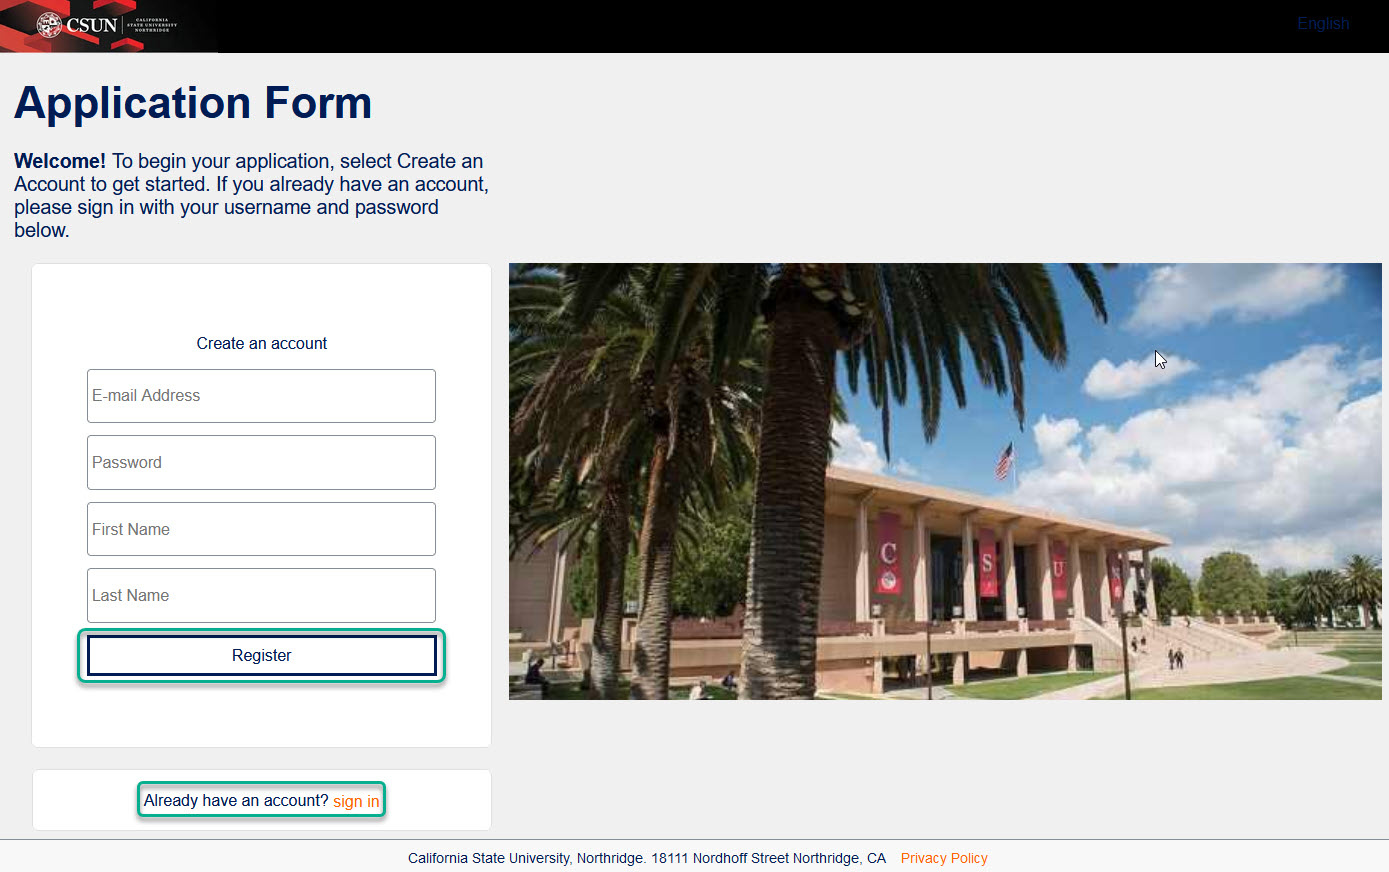
Register = First time Tseng College Applicants, create an application profile
Sign in = previous Tseng College application submitted or saved
Note: A CSUN User ID for the portal is not the same as an application User ID
| Screen | Details |
|---|---|
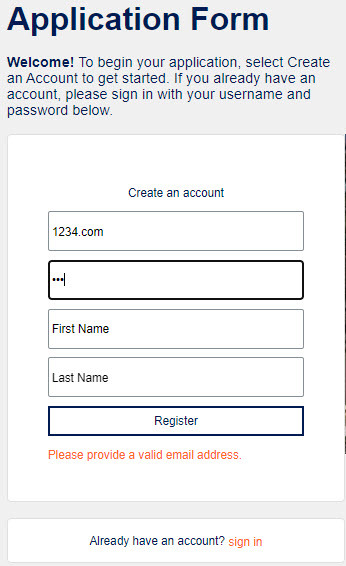 | A valid email is required. Please note that initial email communications will be sent to this email, including instructions on how to access CSUN portal and CSUN email accounts. Invalid or incorrect email addresses may cause delays. |
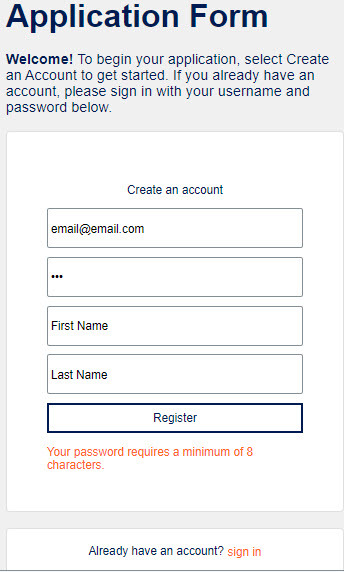 | Passwords must be a minimum of 8-characters. |
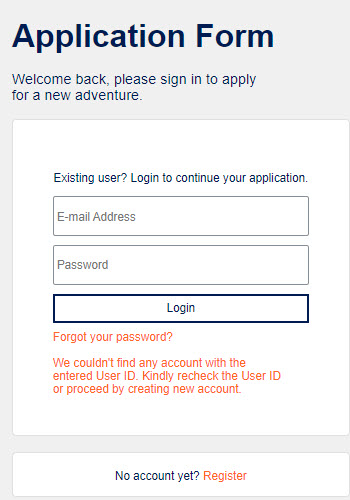 | For existing users, make sure you are entering the email used to create your account and enter your password exactly as created. Note: A CSUN User ID for the portal is not the same as an application User ID |
| Instruction | Screen |
|---|---|
| 1. Select “Sign in,” in the “Already have an account?” section | 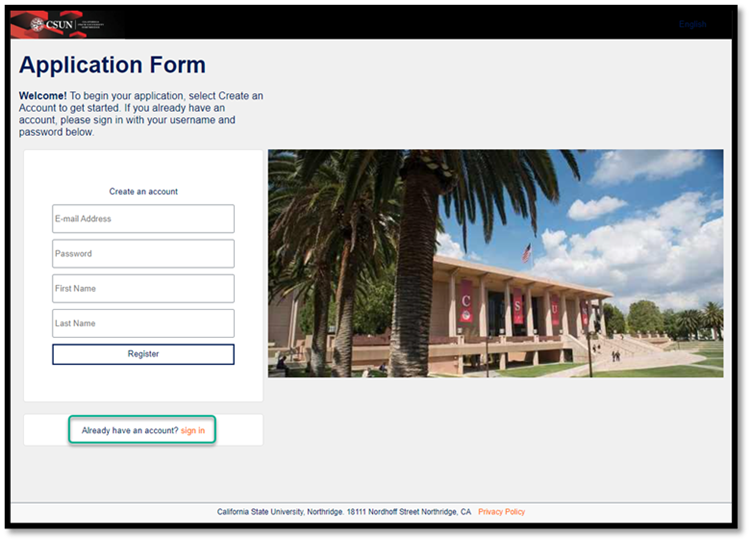 |
| 2. Click on “Forgot your Password?” | 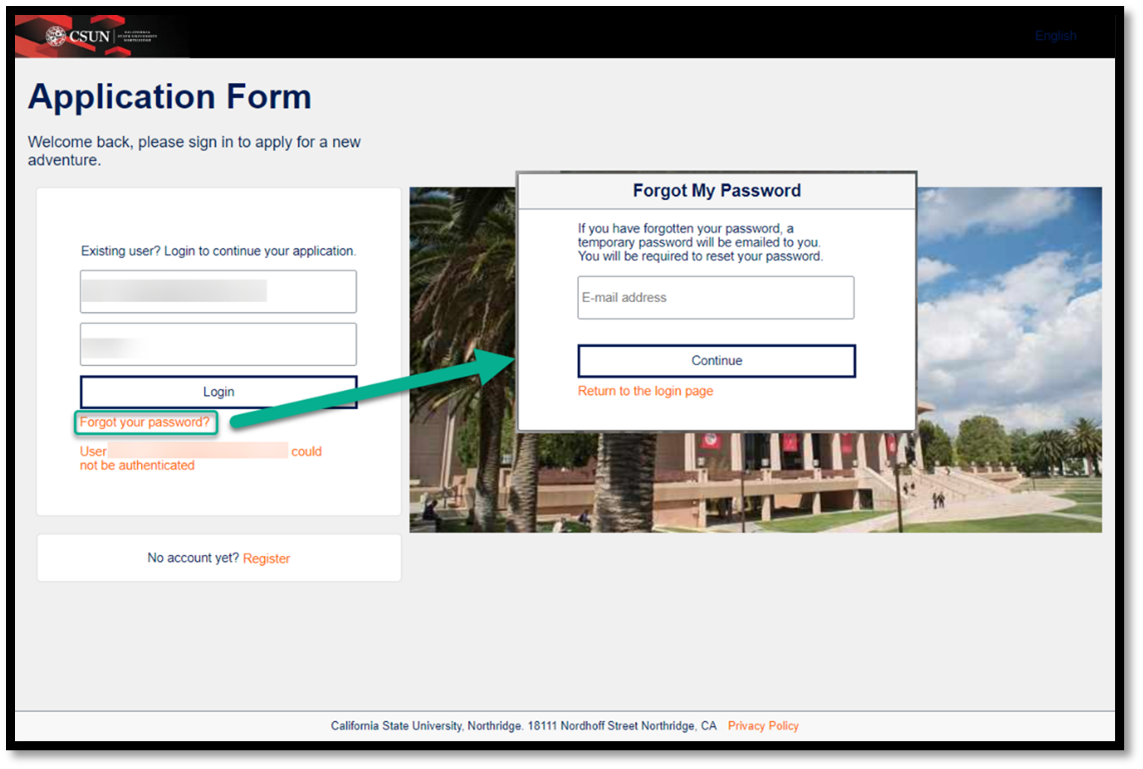 |
| 3. Enter in the Email Address used to create the application, and click “Continue.” | 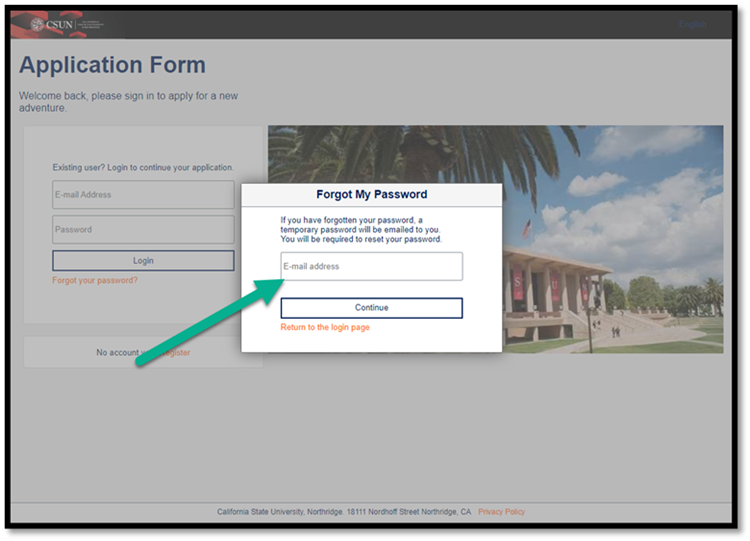 |
| 4. Confirm the password is correct, click “Email New Password.” | 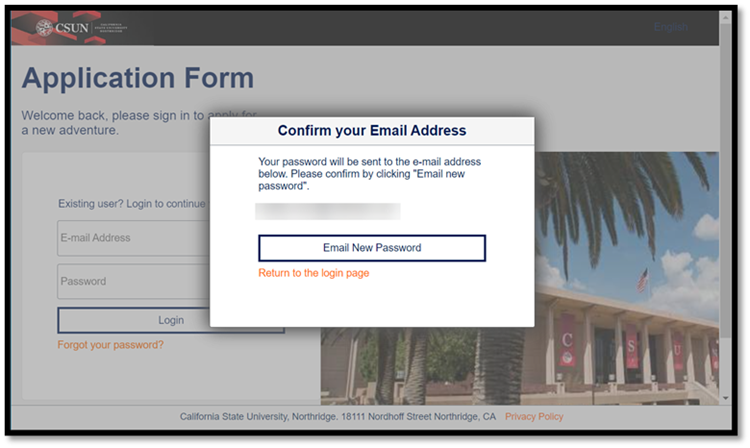 |
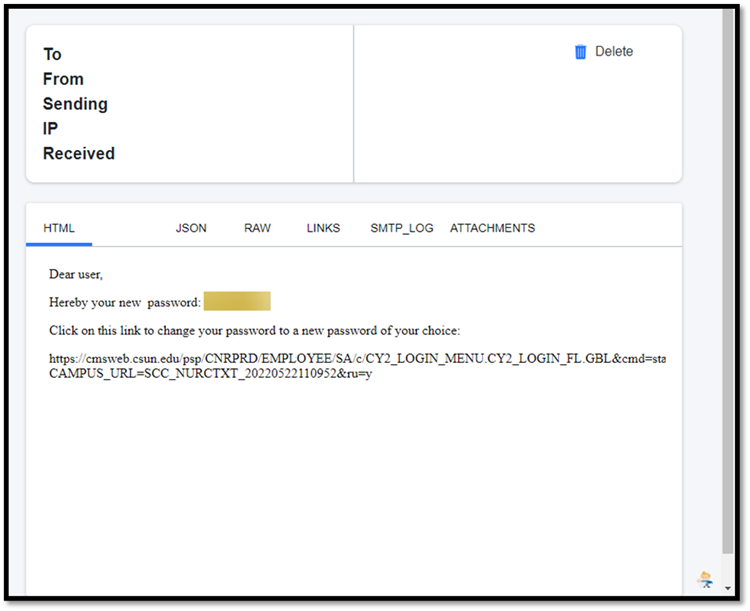
| 5. An email will be sent within 24 hours with a temporary password | 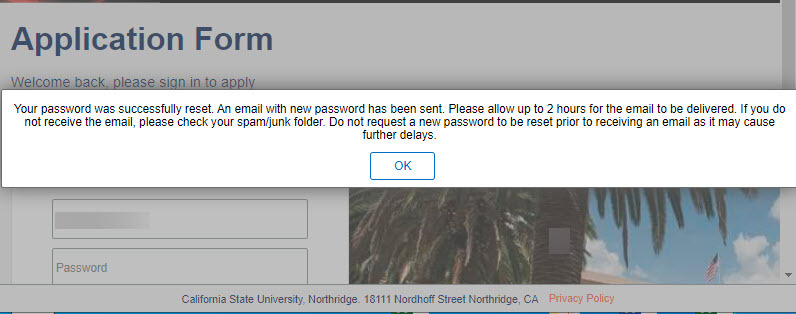
|
| Screen | Details |
|---|---|
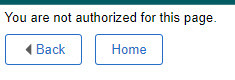 | Error received can be caused by having too many browsers open or accessing the application at the same time as being logged into the CSUN portal account. Passive login - If your CSUN portal password is saved in your web browser, it may be logging you into your CSUN portal in the background, blocking your access to our application. Log out of the portal, and try the application again. To remove error:
|
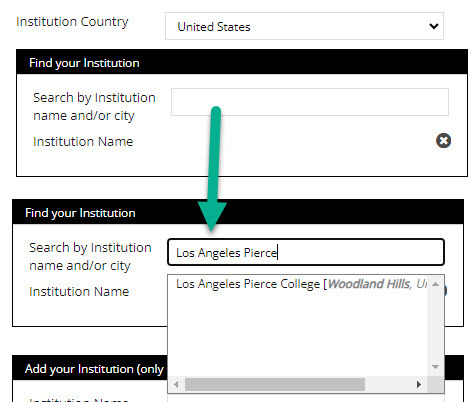
Find your Institution
Begin typing the full institution name or city. The system will display results that match the information you typed. Select the correct matching institution.
It may take several tries to find your school, especially if it shares its name with others or could be spelled differently. For example, if you attended "Saint John's University," you may need to try "Saint John," "St. John," or "St John" (no period) to bring the school up on the list.
Add your Institution
If the institution is still not found above, proceed to "Add your Institution” and complete the additional information requested.
| Screen | Details |
|---|---|
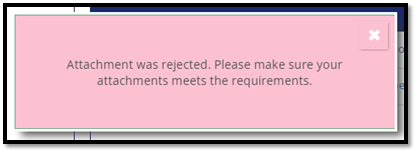
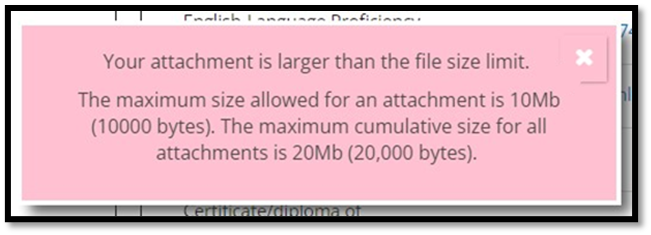
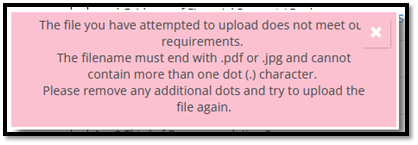
| Error received is caused by incorrect file type or size. Attachment Requirements:
|
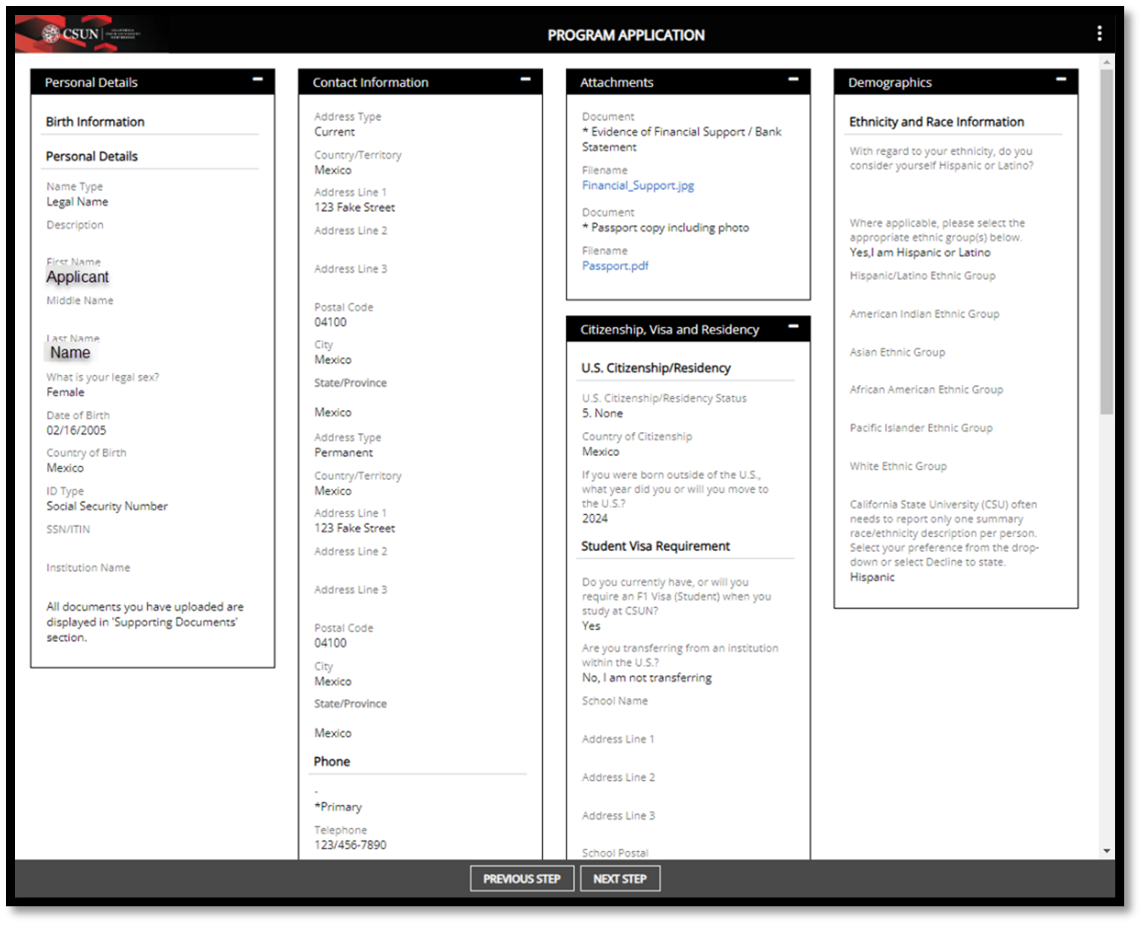
Application Page Overview
This is your opportunity to make sure all the information on the application is correct. If you see blank questions, don’t worry, they were not relevant to your application. A blank answer is correct.
- Click “Save.”
- Proceed to the next page by clicking “Next Step”
After reviewing and agreeing to the Declaration statements, click SAVE. You will not be able to acknowledge this page if any page in the application is incomplete.
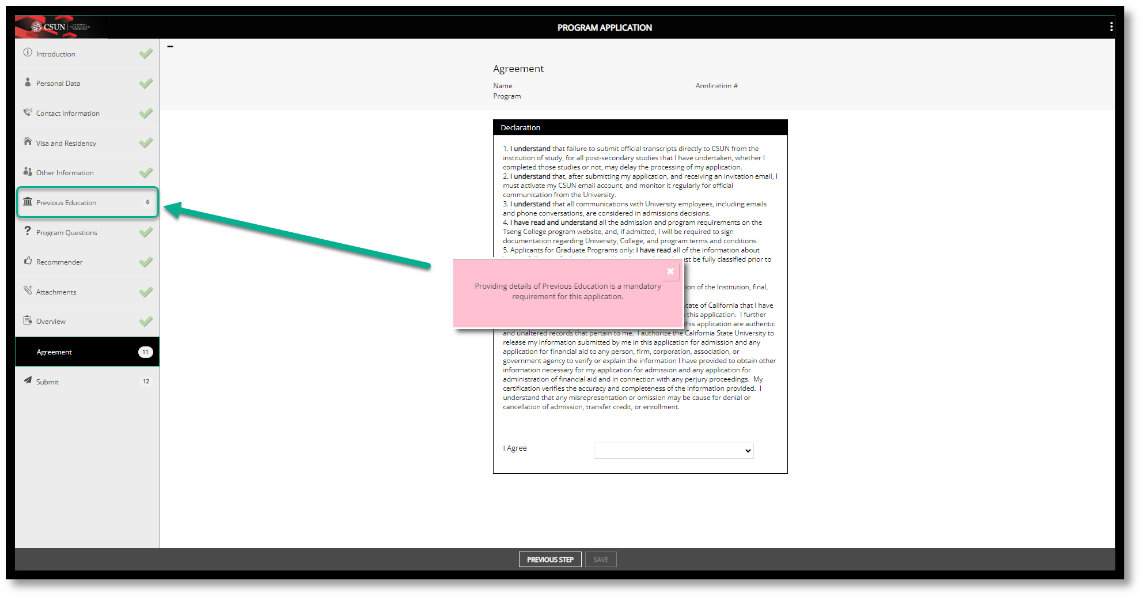
Complete Incomplete Section(s)
If required items are missing, please use the navigation on the left to view incomplete section. Completed sections are marked with a green checkmark.
- After every correction, click SAVE at the bottome of each page.
- Once all corrections have been made and the application has been SAVED, return to the Agreement page to complete.
| Screen | Details |
|---|---|

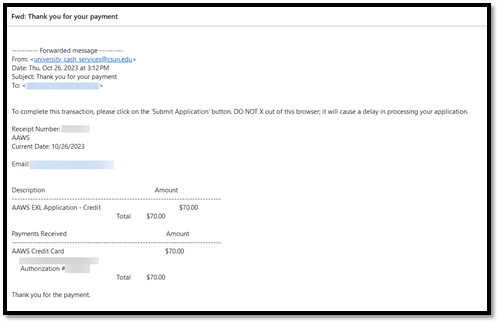
| When the application fee is paid but application shows as “SAVED” or the payment web page timed out, please email collexl@csun.edu a copy of your payment receipt. DO NOT SUBMIT A SECOND PAYMENT! |
| Instruction | Screen |
|---|---|
| 1. Click on the calendar icon. | 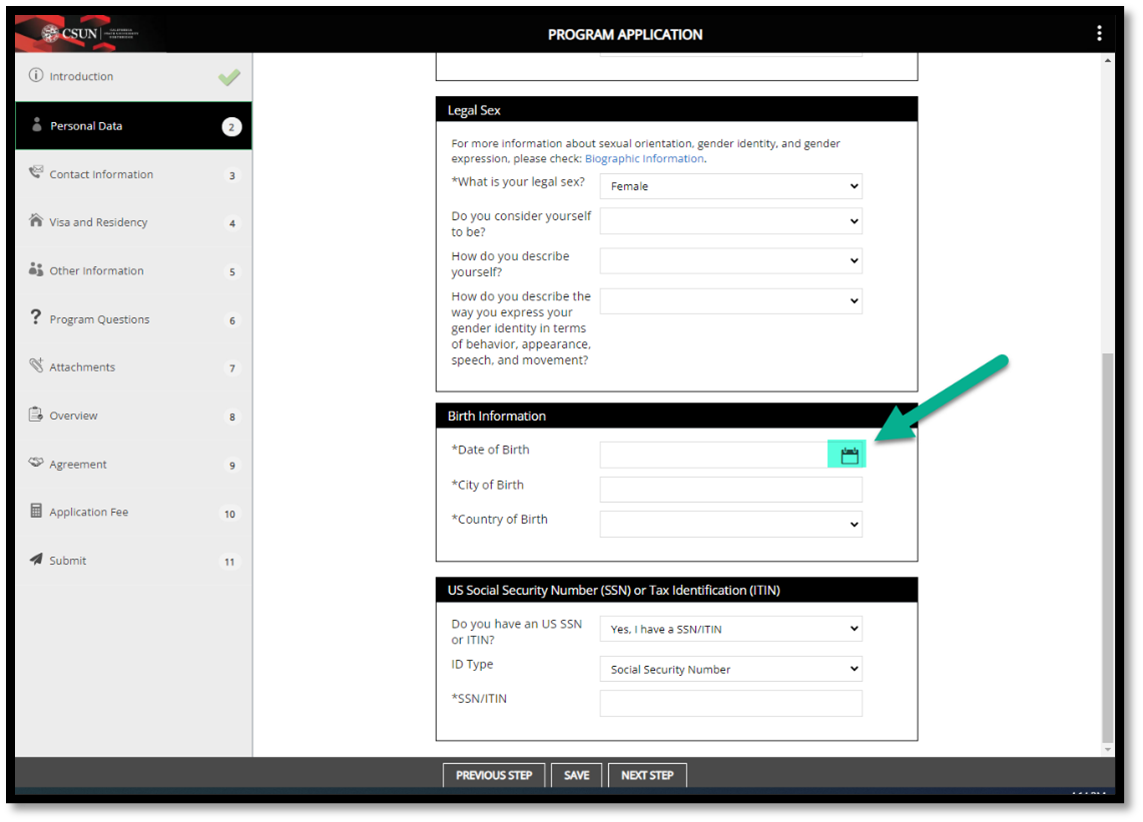 |
| 2. Begin by entering the year. Click on the drop-down to select the desired year. | 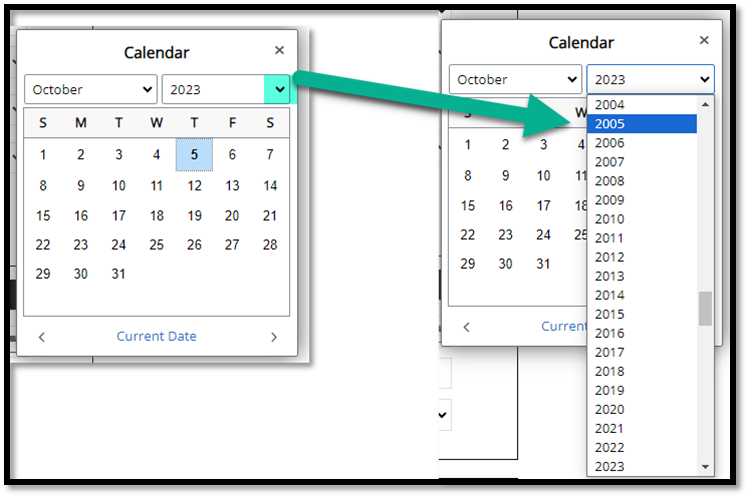 |
| 3. Click on the drop-down option to select the desired month. | 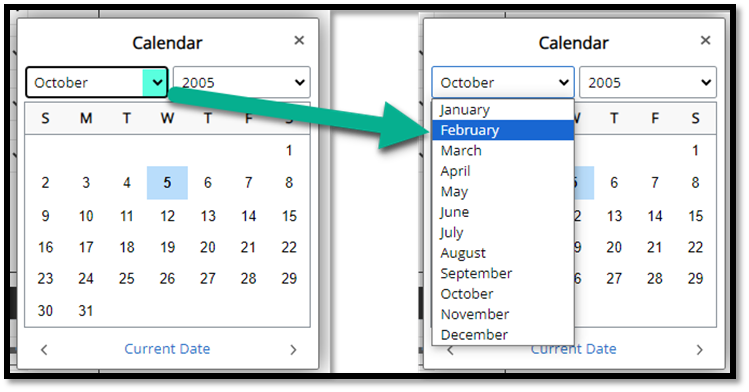 |
| 4. Lastly, click on the desired calendar date. The full date will now be recorded on the application in month/day/year format. | 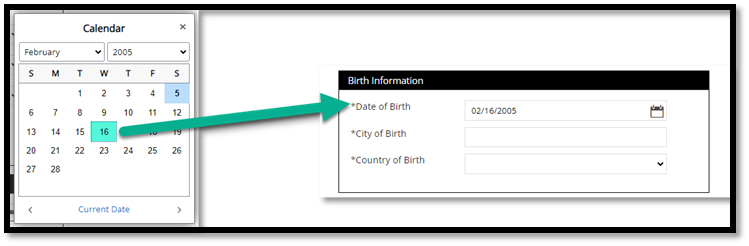 |
| Instruction | Screen |
|---|---|
| 1. Open the Google Chrome browser and click on the three grey dots in the far right corner | 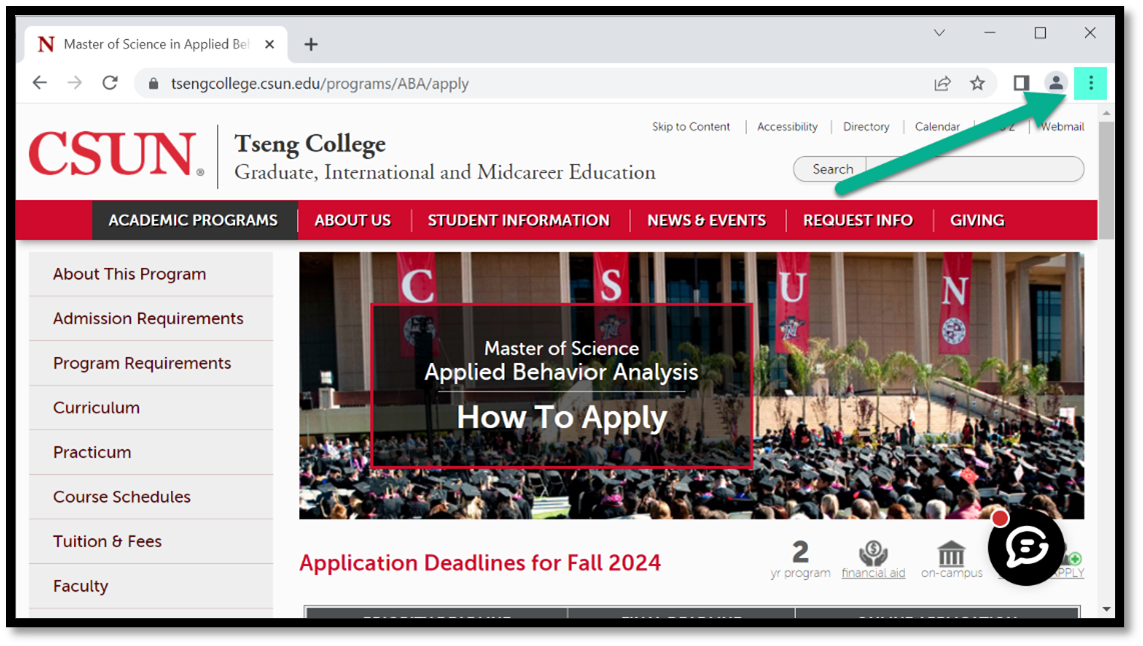 |
| 2. Click on “Settings” | 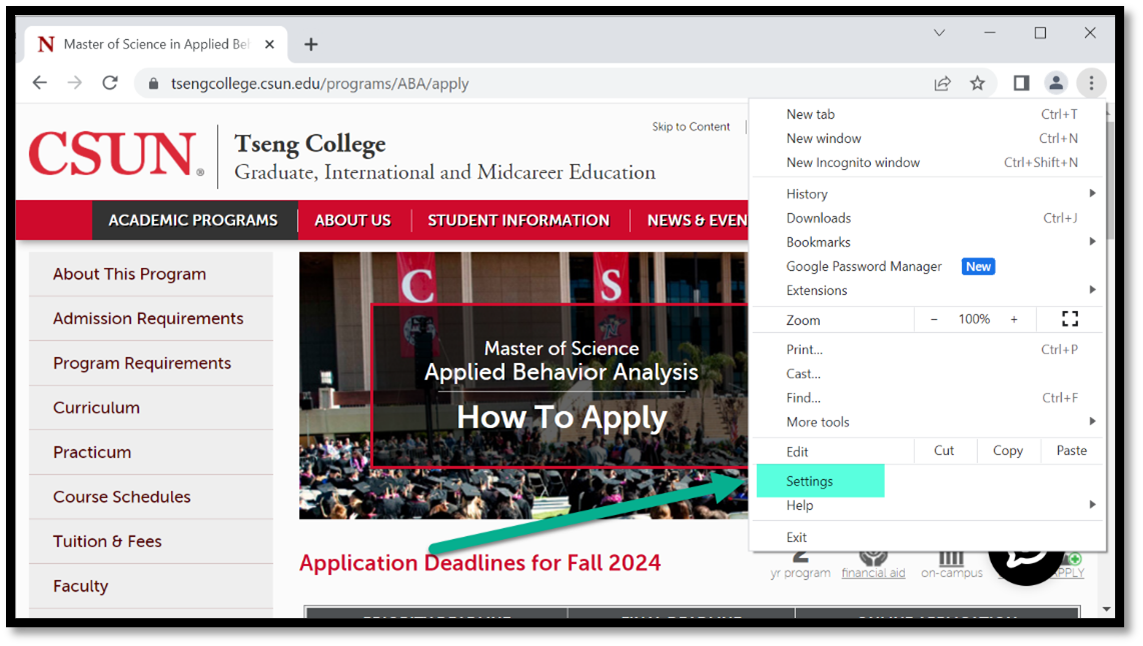 |
| 3. On the left hand side, click on “Privacy and security” | 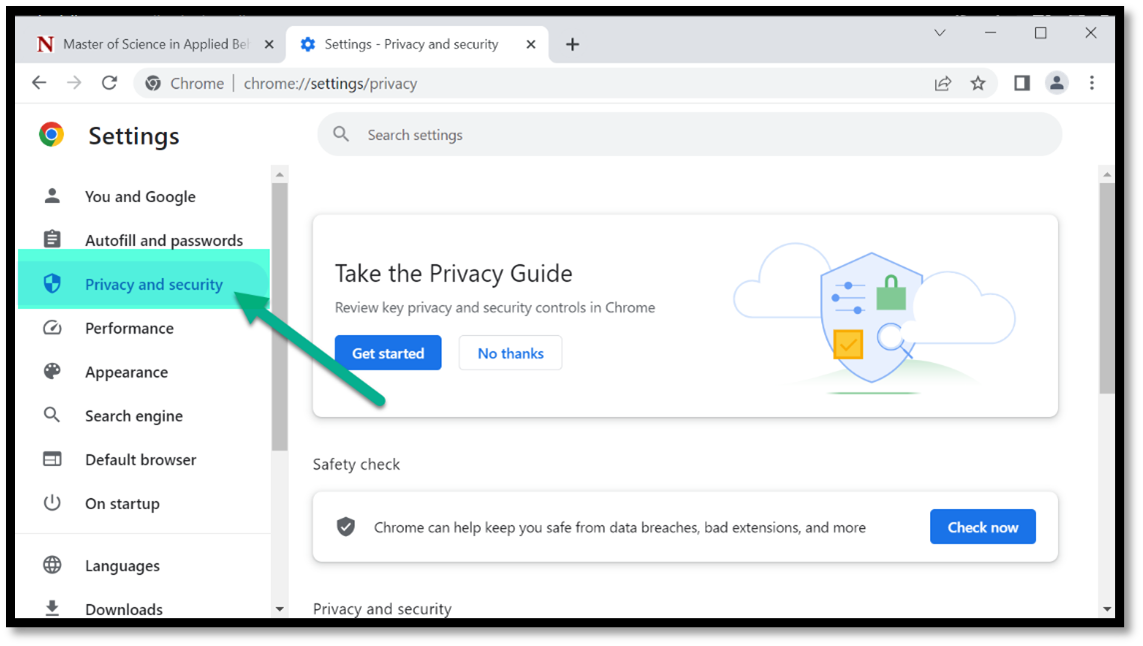 |
| 4. Click on “Site Settings” | 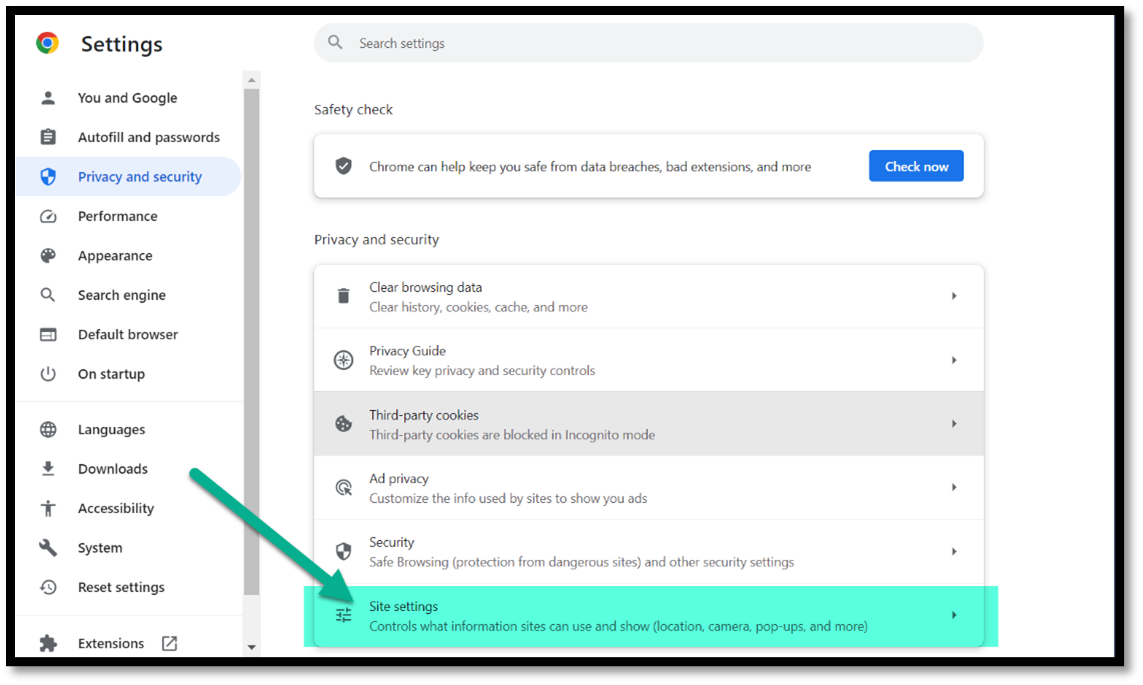 |
| 5. Scroll down and click on “Pop-ups and redirects” | 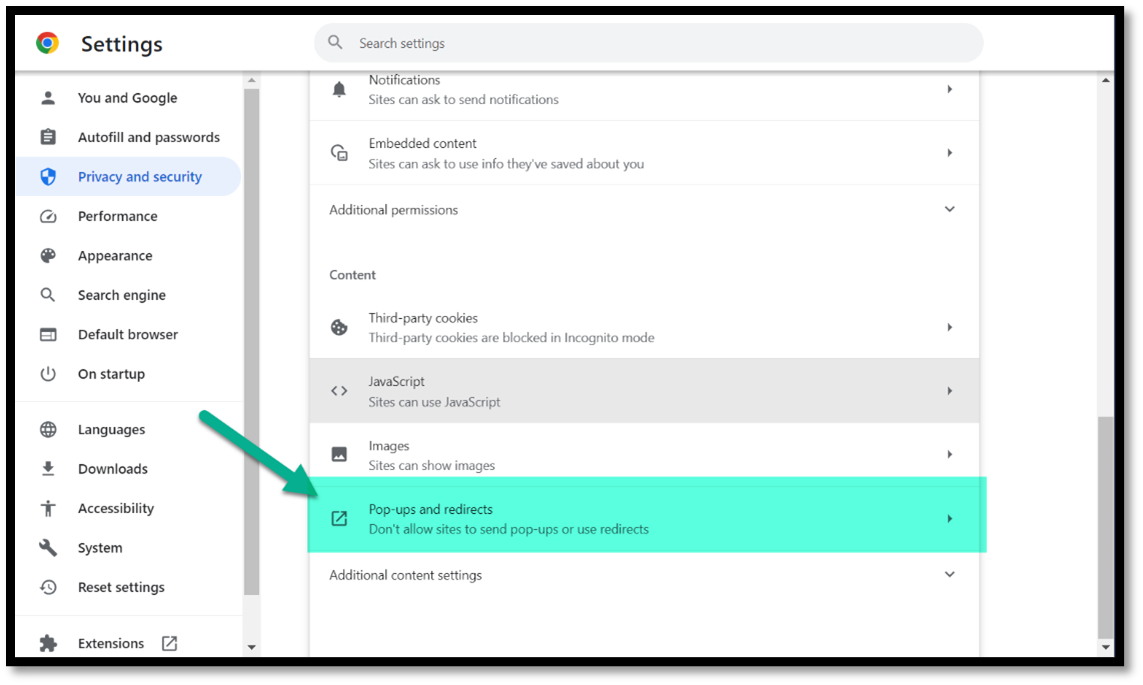 |
| 6. Click the white circle that says “Sites can send pop-ups and use redirects” | 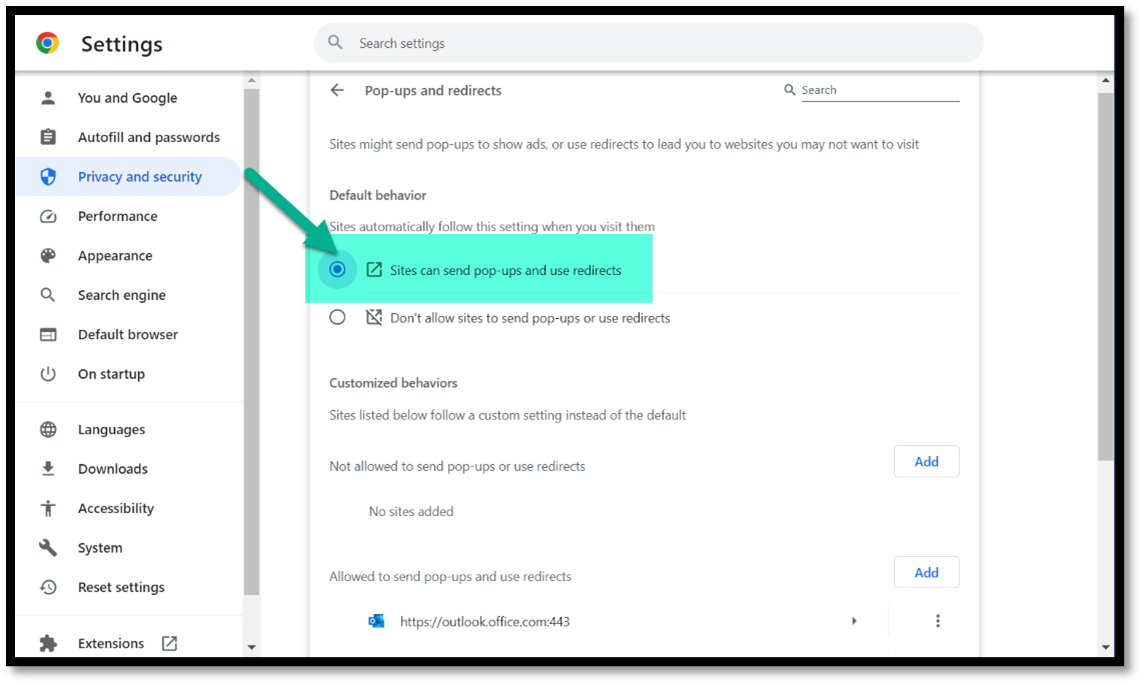 |
| Settings will now be saved to allow pop-ups | |
| Instruction | Screen |
|---|---|
| 1. Open the Firefox browser and click on the three grey bars in the far right corner | 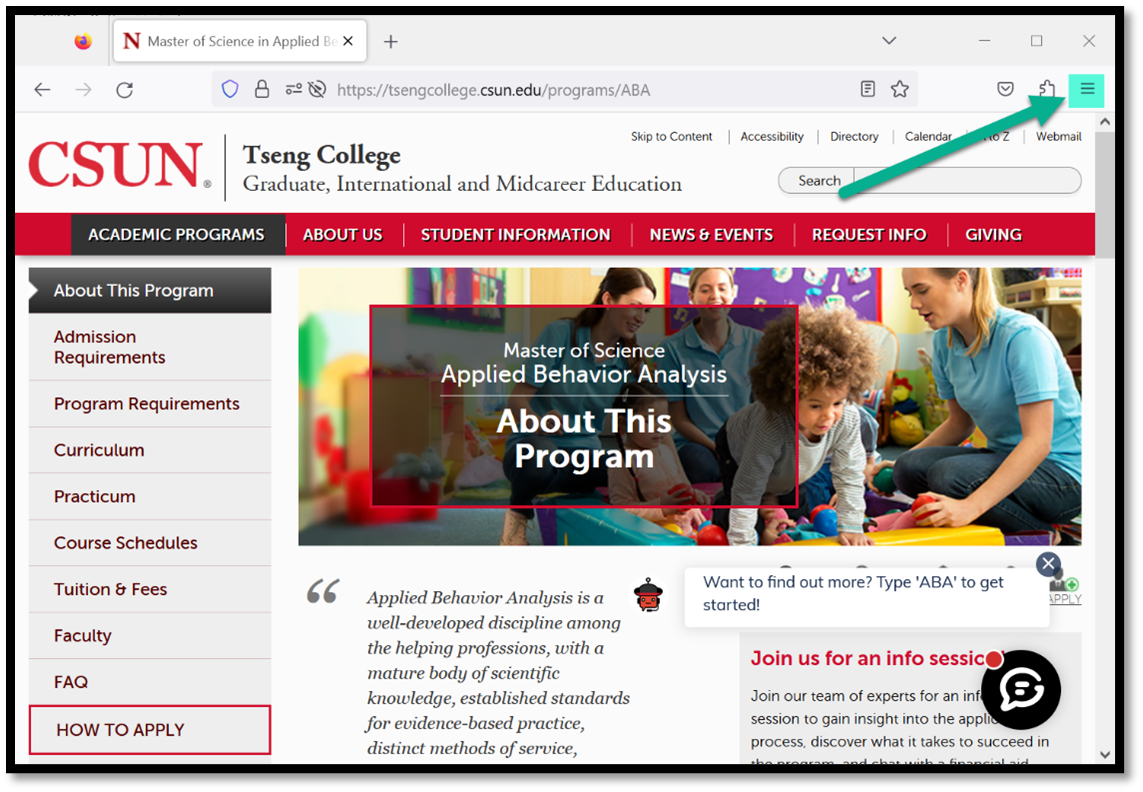 |
| 2. Click on “Settings” | 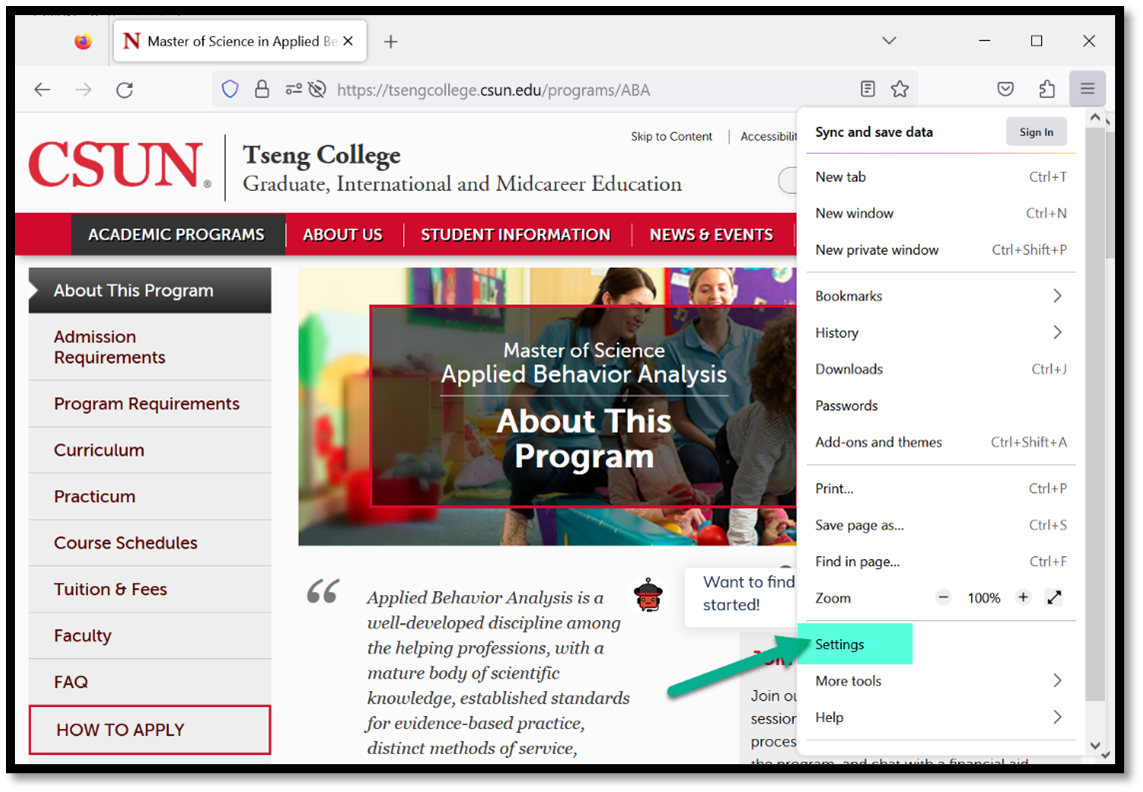 |
| 3. On the left hand side, click on “Privacy and security” | 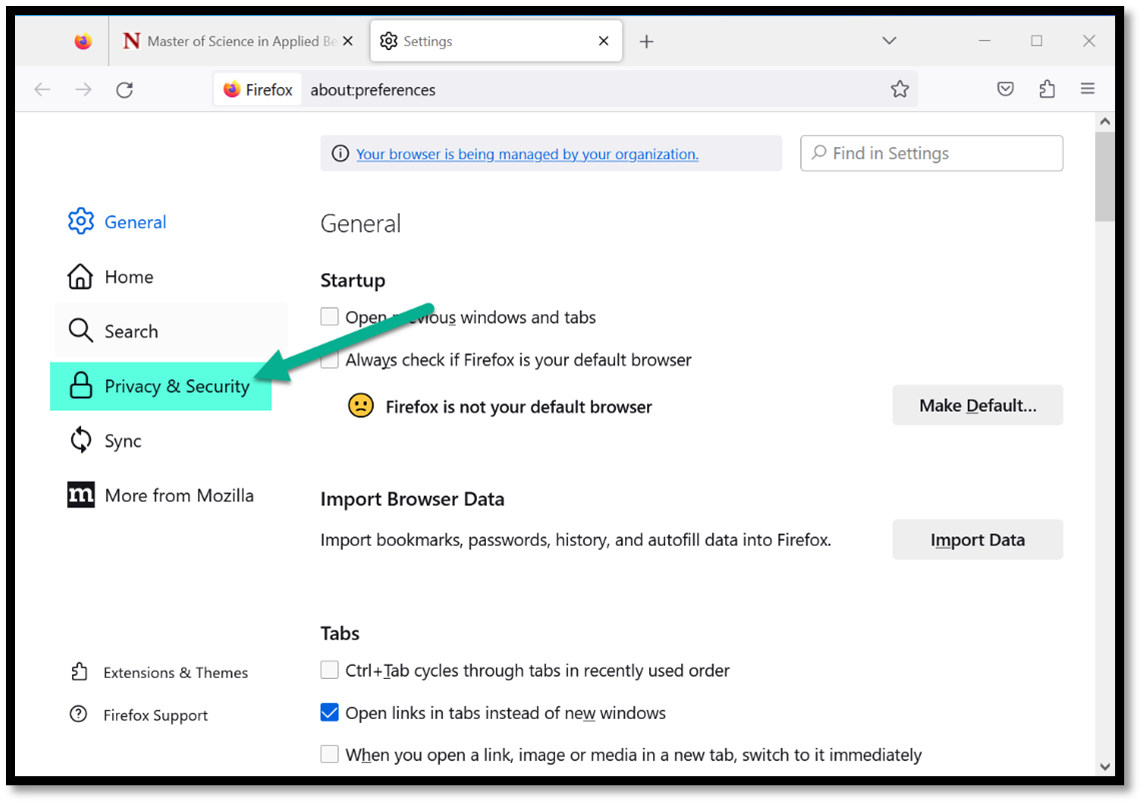 |
| 4. Scroll down to the Permissions section and uncheck the “Block pop-up windows” box | 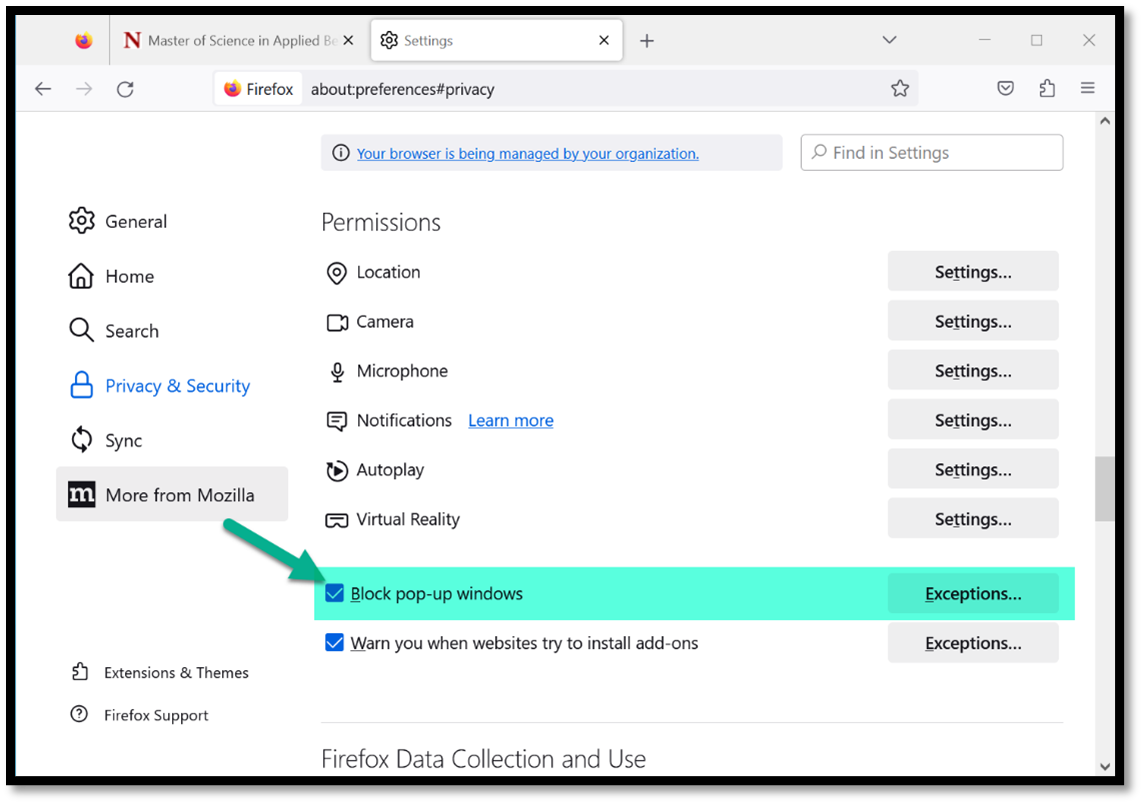 |
| 5. Once the box is unchecked the settings will be saved | 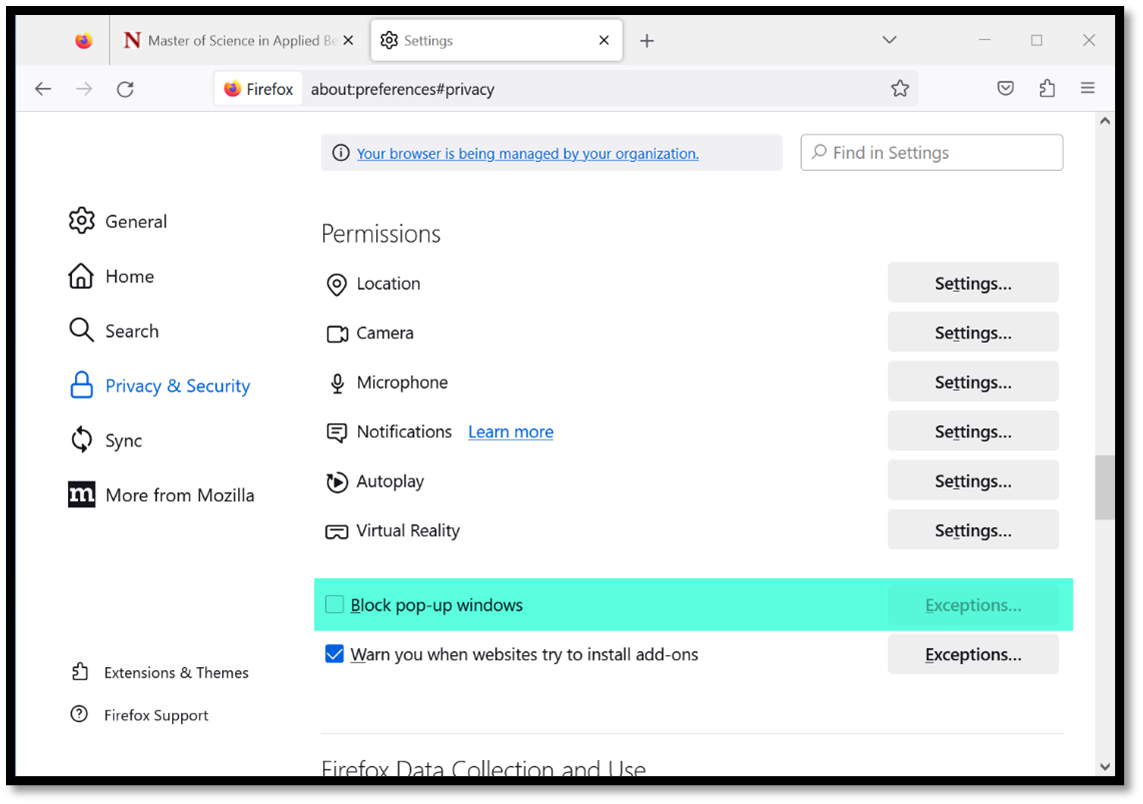 |
| Instruction | Screen |
|---|---|
| 1. Open the Edge browser and click on the three grey dots in the far right corner | 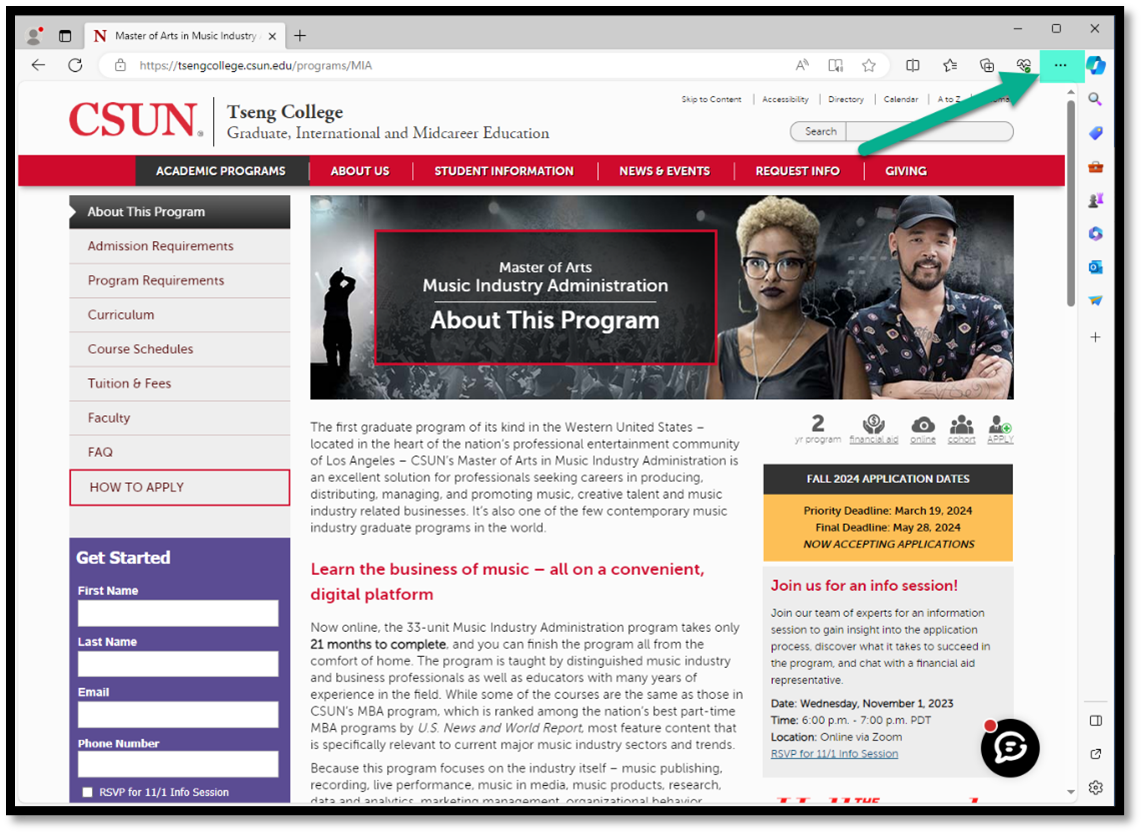 |
| 2. Click on “Settings” | 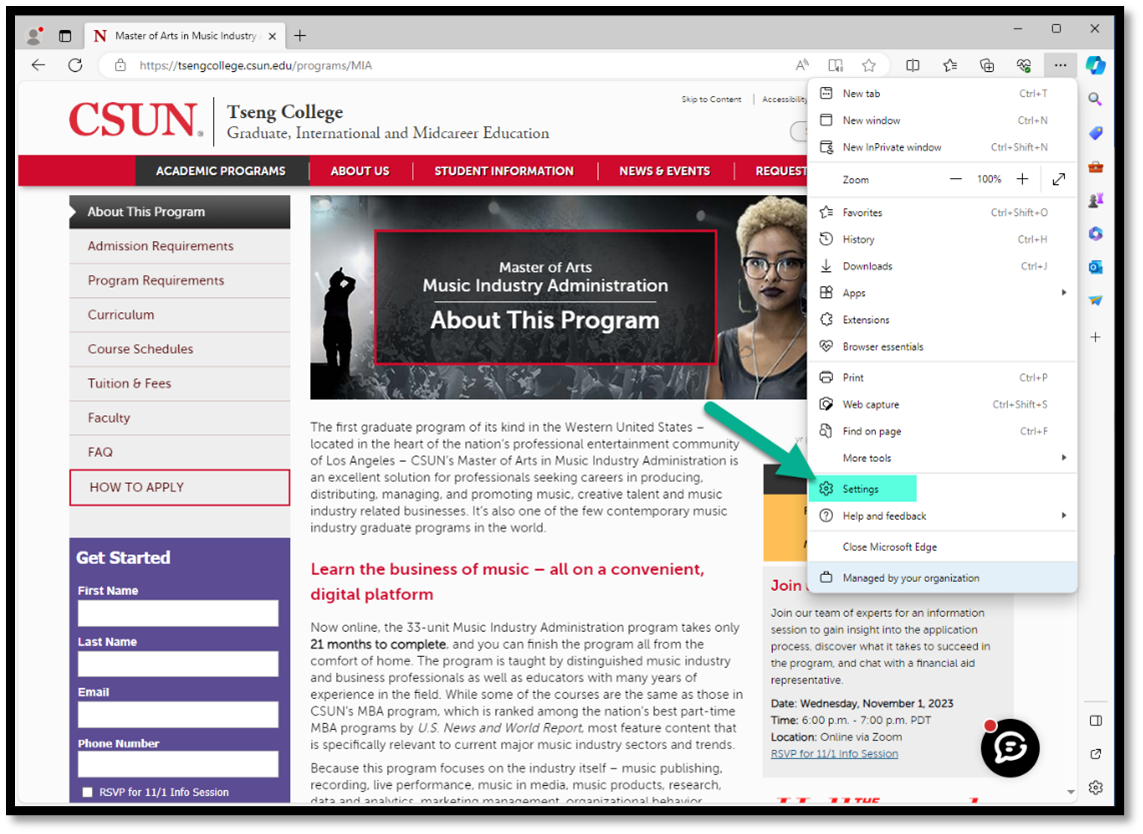 |
| 3. On the left hand side, click on “Cookies and site permissions” | 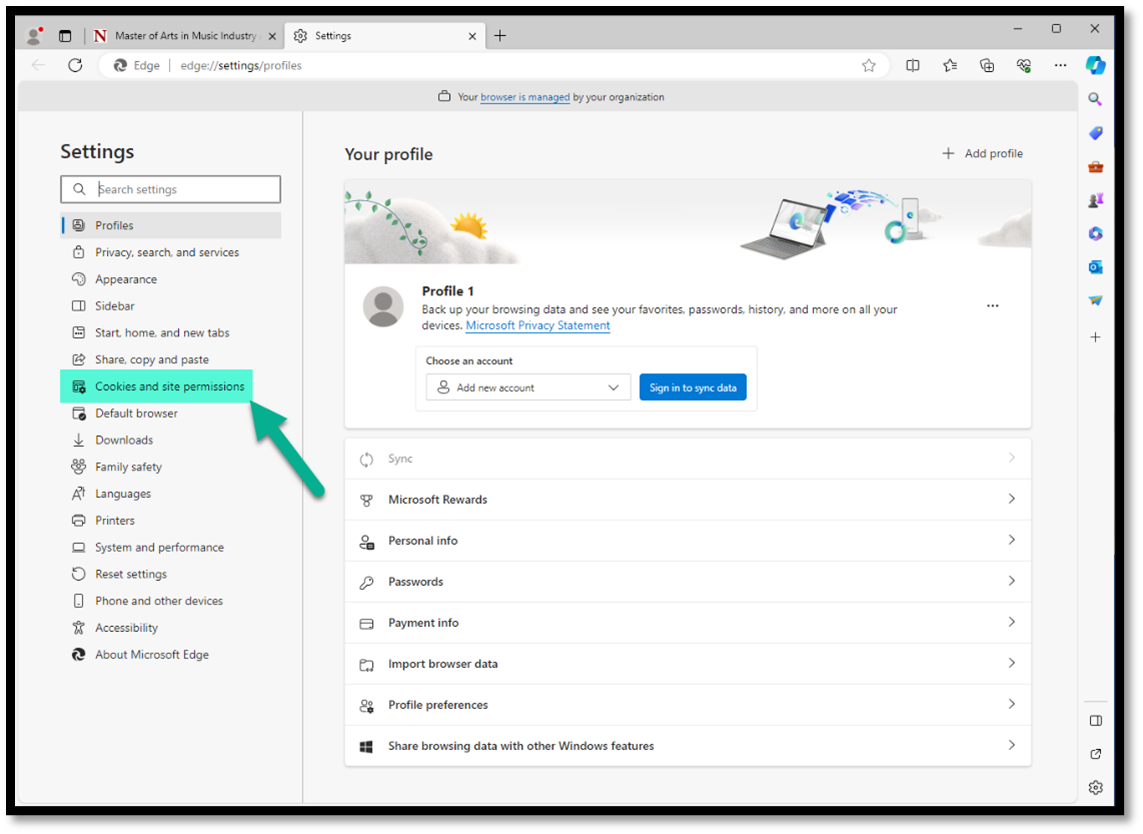 |
| 4. Scroll down to the All Permissions section and click on “Pop-ups and redirects” |  |
| 5. Click on the white circle (toggle button) to turn off the “Blocked” option | 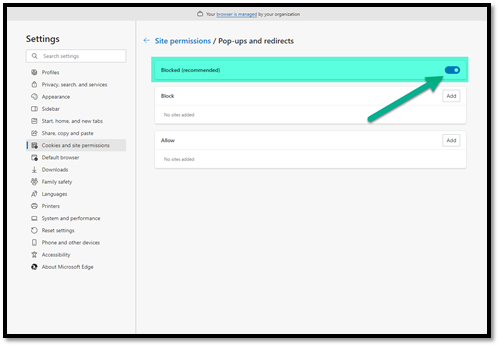 |
| 5. Once the button is toggled off, the settings will be saved | 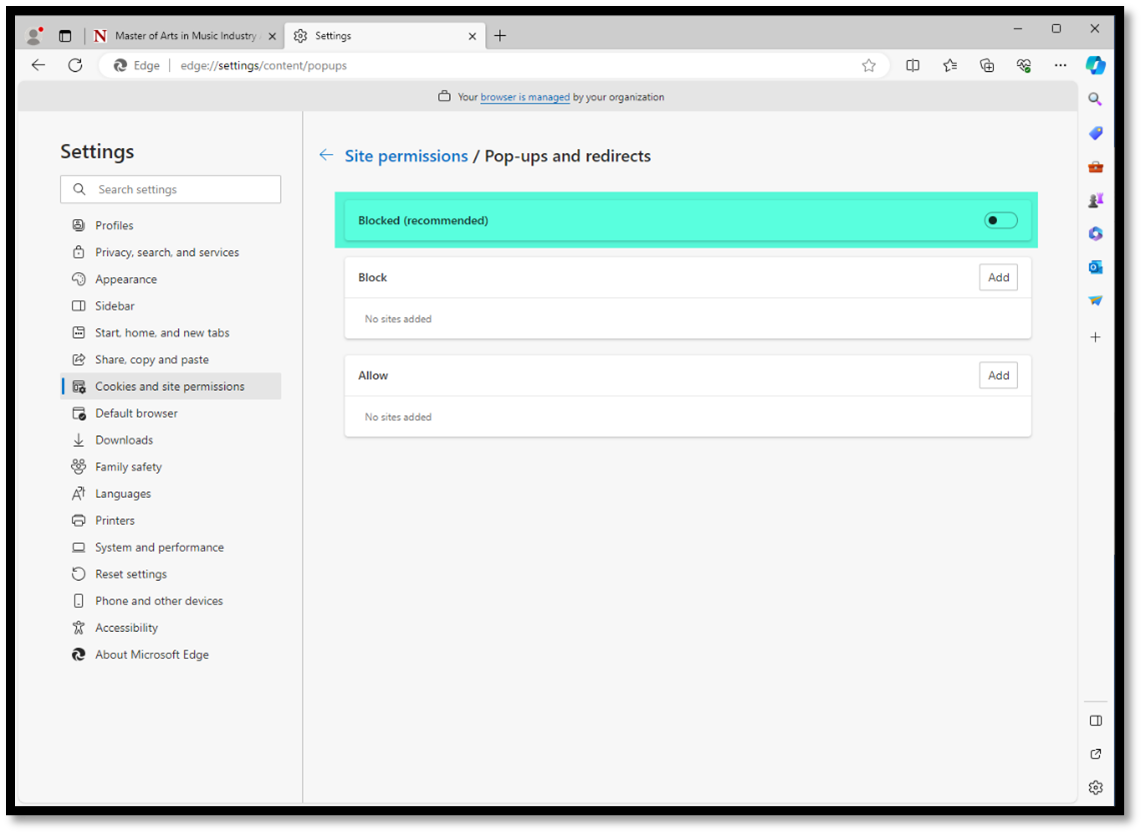 |
| Instruction | Screen |
|---|---|
| 1. Open the Google Chrome browser and click on the three grey dots in the far right corner | 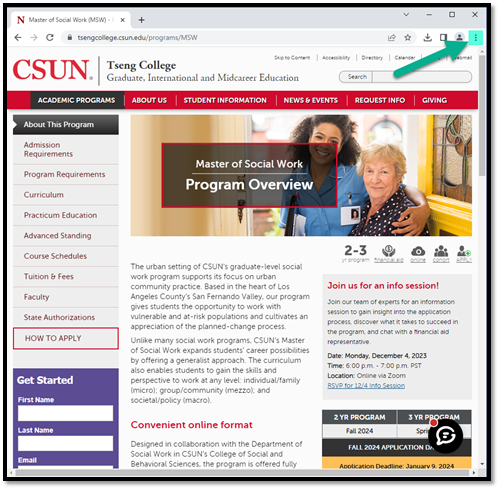 |
| 2. Click on “Settings” | 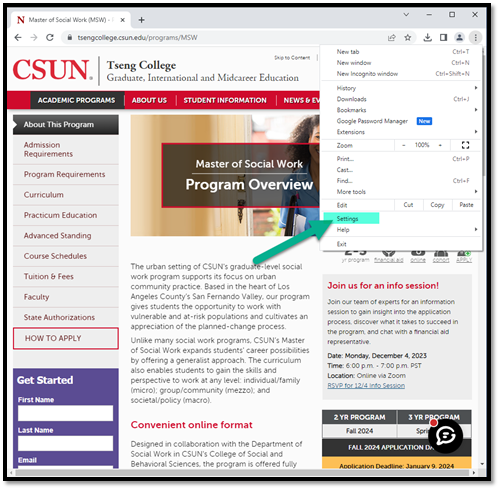 |
| 3. On the left hand side, click on “Privacy and security” | 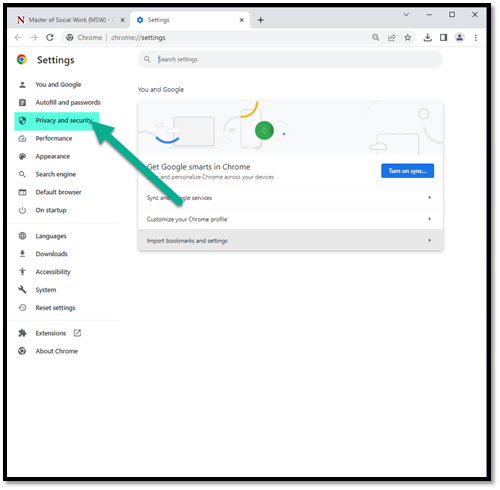 |
| 4. Click on “Clear browsing data” | 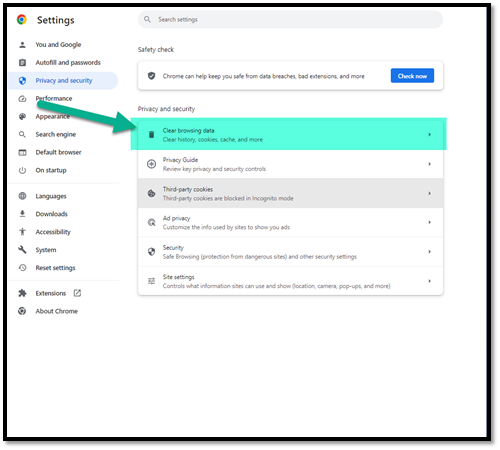 |
| 5. Change the Time range to “All time” using the drop-down menu, then click “Clear data” | 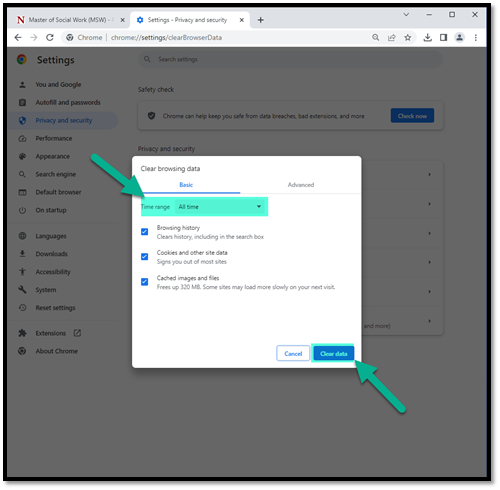 |
| Instruction | Screen |
|---|---|
| 1. Open the Firefox browser and click on the three grey bars in the far right corner | 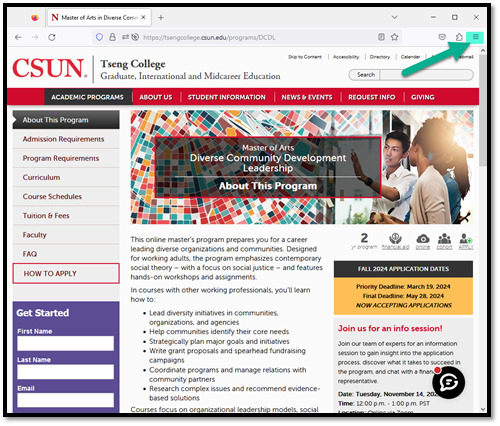 |
| 2. Click on “Settings” | 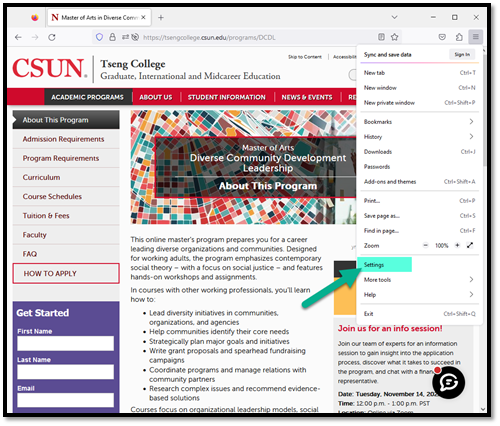 |
| 3. On the left hand side, click on “Privacy and security” | 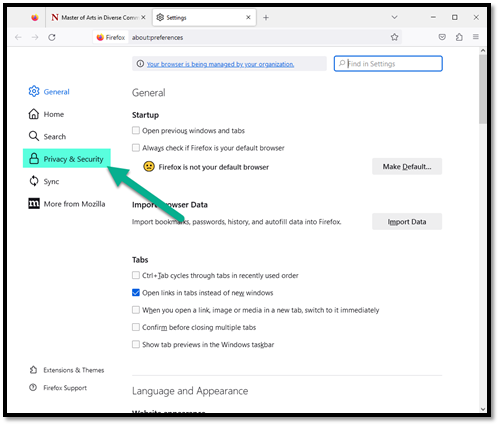 |
| 4. Scroll down to the Cookies and Site Data section and click “Clear Data...” | 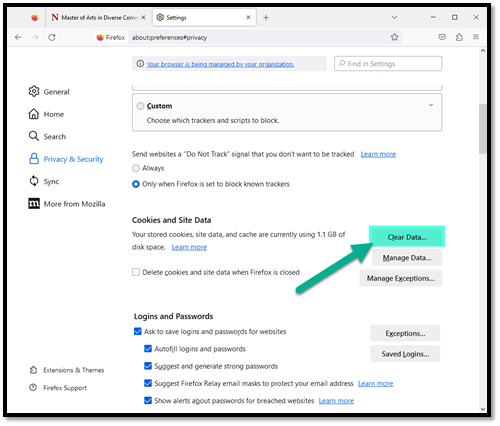 |
| 5. Check the box for Cached Web Content then click “Clear” |  |
| Instruction | Screen |
|---|---|
| 1. Open the Edge browser and click on the three grey dots in the far right corner |  |
| 2. Click on “Settings” |  |
| 3. On the left hand side, click on “Privacy, search, and services” | 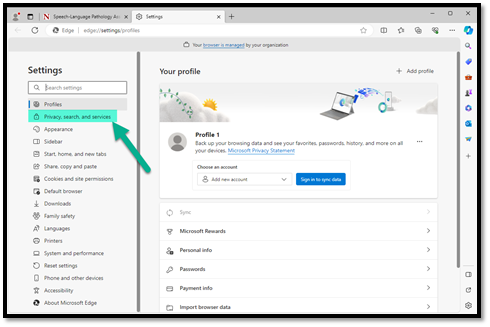 |
| 4. Scroll down to the Clear browsing data section and click on “Choose what to clear” | 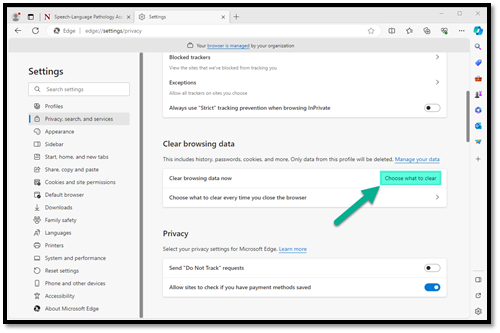 |
| 5. Change the Time range to “All time” and check the box next to “Cached images and files”, then click “Clear now” | 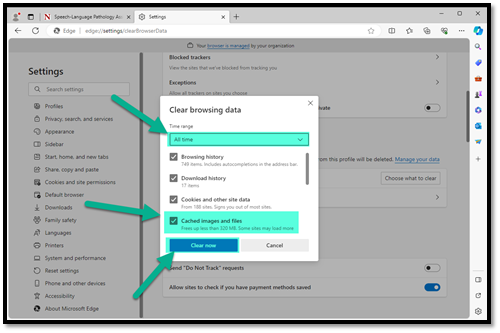 |
Please provide answers to the following questions to the email provided: collexl@csun.edu.
- What is the First Name and Last Name on the application?
- What program are you applying to?
- What are you trying to do?
- Login or Create Application Profile
- Enter data
- Declaration/Agreement Page
- Make a payment
- What error message are you receiving (provide a screenshot of the error)?